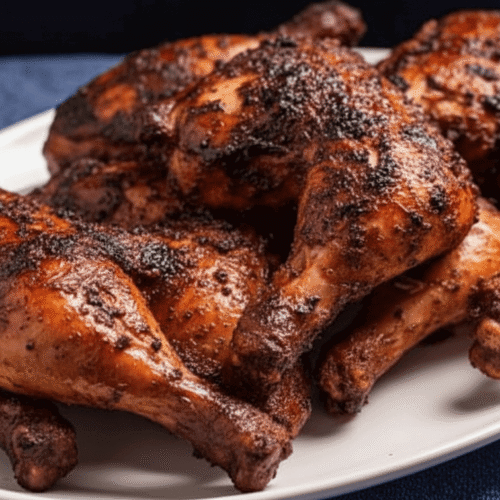
Nelsons Port A Pit Chicken Recipe
Have you ever tasted chicken that's smoky and juicy? Nelsons Port A Pit Chicken Recipe is that amazing dish.
Equipment
- Large charcoal grill or smoker
- Meat thermometer
- Long metal skewers
- Large mixing bowl
- Basting brush
- Heavy-duty aluminum foil
- Tongs
- Sharp knife
- Cutting board
Ingredients
- 4 pounds whole chicken cut into quarters
- 2 tablespoons vegetable oil
- 2 tablespoons paprika
- 1 tablespoon garlic powder
- 1 tablespoon onion powder
- 2 teaspoons black pepper
- 2 teaspoons salt
- 1 teaspoon cayenne pepper
- 1 teaspoon dried oregano
- 1 cup apple cider vinegar
- 1/2 cup water
- 1/4 cup vegetable oil
- 2 tablespoons Worcestershire sauce
- 1 tablespoon hot sauce
- 1 teaspoon salt
Instructions
- Start by washing the chicken pieces thoroughly. Pat them completely dry with paper towels.
- Wet chicken won't get that crispy skin. Rub each piece lightly with vegetable oil.
- This helps the seasonings stick to the meat. Place all pieces in your large bowl.
- Mix all the dry rub spices together well. Combine paprika, garlic powder, and onion powder first.
- Add the peppers, salt, and oregano next. Stir everything until colors blend evenly together.
- This creates your signature Port A Pit seasoning.
- Sprinkle the dry rub generously over each piece.
- Use your hands to massage it in thoroughly. Make sure every part gets covered with seasoning.
- Don't forget to season under the skin too. Let the chicken sit for 30 minutes minimum.
- This allows flavors to soak into the meat.
- Combine vinegar, water, and oil in a bowl.
- Add Worcestershire sauce and hot sauce to it. Mix in the salt until everything combines well.
- Taste and adjust the seasoning if needed. Keep this sauce ready beside your grill.
- Light your charcoal and let it burn down. You want medium heat, not blazing hot flames. Push coals to one side for indirect cooking.
- This prevents the chicken from burning too quickly. Oil your grill grates to prevent sticking issues.
- Place chicken pieces on the cooler grill side. Skin side should face up at first. Close the lid to trap the smoke inside.
- Let it cook for about 20 minutes undisturbed. Don't peek too often or heat escapes.
- Open the grill and baste chicken with sauce. Use your brush to coat each piece generously. Flip the chicken to cook the other side.
- Baste again after flipping for maximum flavor. Close the lid and cook 20 minutes more.
- Keep basting every 15 minutes until chicken is done. The sauce creates that signature tangy flavor.
- Flip the pieces occasionally for even cooking. Watch for flare-ups from dripping fat carefully. Move chicken away from any flames immediately.
- Insert your meat thermometer into the thickest part. It should read 165°F for safe eating. The juices should run clear, not pink.
- The skin should look golden and crispy. If not done, cook a few minutes longer.
- Remove chicken from the grill onto a platter. Let it rest for 10 minutes before serving.
- This keeps all the juices inside the meat. The resting time makes chicken extra tender. Serve hot with your favorite summer sides.
Notes
- Start with quality chicken from a trusted source. Fresh chicken always tastes better than frozen options.
- Don't rush the marinating time for best results. Patience makes the flavors develop properly and deeply.
- Keep your grill temperature steady throughout the cooking. Too hot will burn the outside quickly.
- Too cool takes forever and dries the meat. Medium heat gives you the perfect balance needed.
- Baste often but don't overdo it completely. Each basting adds flavor but also cools down.
- Find your rhythm between basting and cooking time. The vinegar sauce keeps the chicken moist always.
- Use real charcoal instead of gas if possible. Charcoal gives that authentic smoky Port A Pit taste.
- Wood chips add even more delicious flavor depth. Hickory or apple wood work wonderfully for chicken.
- Let the chicken rest after cooking is finished. Cutting immediately releases all the precious juices.
- Those 10 minutes make a huge difference overall. Your patience will be rewarded with tender meat.